
Switching to another phone: 'Yes' or 'Stress'
For many people, the idea of switching to a different phone can be extremely stressful.

or

Where it all starts...
Switching to another phone really doesn't have to be stressful. A stressful switch does require a few things, but it is certainly not complicated! We will explain how to do that in this article. A smooth switch depends on having a recent backup (at least, if you think it is important to transfer the current data of your mail, WhatsApp and photos to the other phone, how to do that you can read in this article) and, not entirely unimportant, on having an updated administration! By that we mean the 'usernames & passwords' administration. If you have the things just mentioned (recent backup and the 'administration') in order, then it is really easy for everyone to do.
The preparation
In this first example, we assume that both the current and the new phone are from the Samsung brand. We will come back to the Apple iPhone in this article. The Samsung Smart Switch app makes the switch easy, this app transfers the data and settings from the old device. Think of contacts, music, photos, calendar and device settings, the app transfers it all within a few minutes. The information also remains on the old device, Smart Switch only makes a copy.
To transfer the information, both phones must have the free Samsung Smart Switch app. This is possible on devices with Android 4.3 or higher. The phones must be connected to each other, for example via a cable or via the WiFi network.


Let's get started
Check whether the Samsung Smart Switch app is actually installed on both phones. If not, do that first, otherwise we cannot continue with the steps below.
Open the Samsung Smart Switch app on both phones.
Tap 'Allow' on both devices.
Tap Allow again to agree to the permissions.
Tap 'Send data' on the old device.
-
Tap 'Receive data' on the new device.
-
Tap the brand of the old device on the new device, in our example 'Galaxy/Android'.
-
On both devices, tap the choice of how you want to connect. This can be done via a cable or via a WiFi connection. If you choose a cable, connect both devices to each other. If you choose a WiFi connection, connect both devices to the same network.
-
Tap Connect on the old device.
-
On the new device, tap which data you want to transfer, then tap Next.
-
Tap Copy on the old device.
-
Unlock the device with a PIN or other set unlock method.
-
The transfer will begin, please wait patiently. Follow the progress on the screen.
-
When the transfer is complete, tap Done on the old device.
-
On the new device, tap Next and then Done.
Do I need to connect my headphones, speakers, and other devices to my new Android device?
Yes, you may need to re-pair some of your devices to your new Android device using the Bluetooth settings.
What if I no longer have my old device?
If you’ve previously backed up data with Google Drive, you can restore content, data, and settings from an old device, even if you no longer have it. So, during setup, skip the “Set up with another device” step and choose to restore data from an old device.
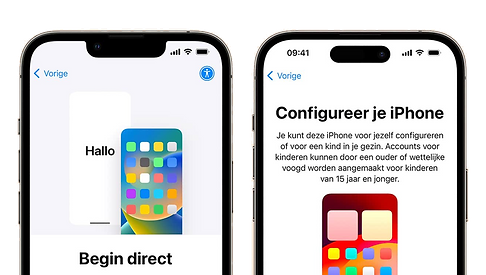
Transfer data wirelessly with 'Get Started Now'.
Got a new iPhone to replace your old one? You can then place both iPhone phones next to each other. Works with Get started immediately The new iPhone will recognize the old model. Then follow these steps to transfer the data from your old iPhone:
-
With the new iPhone you connect to the same Wi-Fi network.
-
Set up Touch ID or Face ID on your new iPhone.
-
Choose how you want to transfer your data. This can be from iCloud or from your old iPhone.
-
Then choose from your old iPhone. Everything will be transferred at once. You do not need to download data from iCloud afterwards.
Transfer iPhone with a backup
You can transfer your iPhone data with a backup. You first make this iPhone backup on your old iPhone. You can then sell it and buy your new iPhone with the money. Then follow these steps on your new iPhone:
-
Turn on your iPhone until you see the Hello message.
-
Follow the steps and set up your WiFi.
-
Follow the steps until you reach the Apps & Data screen.
-
Select Restore from iCloud Backup.
-
Log in with your Apple ID and password and restore the backup.
Transfer iPhone using PC or Mac
You can also transfer data to your iPhone from your iMac or PC. Here's how:
-
Turn on your iPhone until you see the Hello message.
-
Follow the steps and set up your WiFi.
-
Follow the steps until you reach the Apps & Data screen.
-
Select Restore from iMac or PC.
-
Connect your iPhone to your iMac or PC.
To transfer iPhone from your iMac, do the following:
-
Open your Finder window on your Mac
-
Select your iPhone.
-
Tap General.
-
Select Restore Backup.
-
Now select the backup you want to restore.
Here's how to transfer iPhone from your PC:
-
Make sure you have the latest version of iTunes on your PC.
-
Open iTunes.
-
In the iTunes window, click the button that looks like an iPhone.
-
Tap Overview.
-
Then click on Restore Backup.
-
Now select the backup you want to restore.
Even more transfers
Here are 3 ways to transfer your iPhone data. This way, you can start with much of your current data on your new iPhone. However, there are still a few other things to transfer, so you really have everything ready on your new iPhone.
Transfer WhatsApp to a new iPhone
On your new iPhone, you have WhatsApp when you transfer your iPhone data. But without a backup of WhatsApp itself, you will miss messages or conversations. You want to transfer WhatsApp properly. Here's how to make a backup on your old iPhone:
-
Open WhatsApp.
-
Go to Settings.
-
Select Chats.
-
Select Backup Chats.
-
Select 'Back Up Now'.
On your new iPhone, open WhatsApp and get your backup there. Then you have all your conversations as you had them before. You can just continue where you left off.
Transfer Google Photos
When you transfer data from your iPhone, all your photos from your photo library will be transferred. Do you use Google Photos? Then you will want to transfer that as well. Here's how:
-
Open Google Photos on your old iPhone.
-
Log into your Google account.
-
Select your account at the top right.
-
Select Photos Settings.
-
Choose Backup and Sync. Turn it on, the backup will be performed.
-
When it's done, you'll see a check mark in a cloud.
On your new iPhone, log in to Google Photos with your Google account and you will immediately see all the photos in your iCloud.